In this article we have a look at k3s and how to get it running on a bunch of RPis using k3sup. Further, we set up OpenFaaS and deploy one function (figlet).
Edit2020.03.01: k3sup app install/info has a successor, which I didn’t try out yet, but it’s called arkade. According to the doc simply replace all k3sup app installs here with arkade install.
I hear and I forget. I see and I remember. I do and I understand.
Disclaimer: This is a work in progress!
Hardware
The hardware is 4 RaspberryPis 3B+ assembled into a sweet little rack.
Power comes over PoE which the router can provide. Choose whatever you like. I’ve chosen the following setup:
| Type | Price/Piece |
|---|---|
| TP-LINK SF1005P 5 Port 10/100 Desktop Switch with 4 PoE | ~40 E |
| RaspberryPi 3B+ | ~40 E |
| Sandisk Ultra 32Gb U1 | ~5 E |
| DSLRKIT Active Splitter PoE 5V 2.4 A Micro USB Plug | ~10 E |
| Jun Raspberry Pi 3B+ Case Pack | ~25 E |
and it looks like this:

Software
As HypriotOS has docker already included, I was rooting for HypriotOS at the time of creation.
There is one pretty nice tutorial by them https://blog.hypriot.com/post/setup-kubernetes-raspberry-pi-cluster/ which assumes you are already connected to the tiny black-pearl. Following that tutorial, one sets up kubernetes in all its glory and resource hunger. It sucks. Don’t do this. The note in my research journal from the time I did this reads: “Kubernetes seems to be rather hungry. Maybe I’ll add a new masternode in the near future.”
We start from first principles today.
Preparing the Pis in a headless way.
Master node
We can start with one Pi. This approach makes the learning experience a little less frustrating. Using Hypriot’s flash tool and cloud-init we flash the most recent image (as of date of writing):
flash -u wifi-user-data.yml --bootconf no-uart-config.txt HypriotOS-rpi-v1.9.0.img.zip
which already takes care of plenty of things. However, you need to explore on Hypriot’s page how to set up all the files going into the flash tool. See here for more details. The investment is worth it, as you can use these templates for the slave Pis later on. Further you can also use a more recent HypriotOS image.
Assuming our wifi config is OK, we should be able to ping black-pearl.yourdomain in our network. To get an overview of our topology we can use nmap , e.g.,
sudo nmap -sn 192.168.1.0/24
This should give us the correct ip/name.
After selecting one of the nodes as master node, we log into it
The default login data are:
user: pirate
pass: hypriot
clean up:
sudo apt remove --purge cloud-init
sudo apt autoremove
and update the OS:
sudo apt-get update
sudo apt-get upgrade
Due to many reasons, I selected the master-node as the only node to have internet access and function as a router for the rest.
sudo apt-get install isc-dhcp-server
We can’t go into all the details of setting up a DHCP. If you want a quick win, adapt https://github.com/kubedge/kube-rpi/blob/master/config/cluster1/HypriotOS/kubemaster-pi/etc/dhcp/dhcpd.conf.
Same goes for the IP forwarding setup. Adapt https://github.com/kubedge/kube-rpi/blob/master/config/cluster1/HypriotOS/kubemaster-pi/etc/sysctl.conf for a quick win.
Keep in mind that the master node has to work as router from eth0 to wlan0 for the other nodes. For the NAT to work we need to configure it:
sudo sh -c "echo 1 > /proc/sys/net/ipv4/ip_forward"
sudo iptables -t nat -A POSTROUTING -o wlan0 -j MASQUERADE
sudo iptables -A FORWARD -i wlan0 -o eth0 -m state --state RELATED,ESTABLISHED -j ACCEPT
sudo iptables -A FORWARD -i eth0 -o wlan0 -j ACCEPT
sudo sh -c "iptables-save > /etc/iptables.ipv4.nat"
After that, uncomment the iptables entry in /etc/network/interfaces.d/eth0.
To check if the routing is working we can plug our laptop into the (hardware) router and check if the master node assigns us an IP in the range 192.168.2.0/255 .
To check the setup (on Linux) we can use nmcli on our laptop, e.g.:
nmcli dev show eth0
This will show us routes , dns , domain and gateway infos. Besides other things.
Slave nodes
Having our flash tool and config files prepared in the step above, things will get easier. I promise.
Next we flash our next sd-card without WLAN. After putting it back into the slave Pi we connect the slave Pi to the router with the cable and log into the master pi from our laptop. The master pi should have assigned an IP to the new slave Pi and we should be able to find it now (with nmap).
After jumphosting from the master node into the slave, we clean up the installation again:
sudo apt-get remove --purge cloud-init
sudo apt-get autoremove
and update the OS:
sudo apt-get update
sudo apt-get upgrade
Following that we assign a new hostname:
sudo hostnamectl set-hostname blackbeard
I’ve chosen the characters from Pirates of the Caribbean. Here is a selection: ‘beckett’, ‘dalma’, ’norrington’.
And now we update the dhcp conf file on the master node to assign a static IP to the slave node such that every time the cluster reboots we have the same network topology. Considering that we might have to move around in the cluster this will ease the hassle. Actually I even noted the IP on the sd-card of each and every node with a permanent pen.
Keeping in mind that we have to restart the dhcp server every time after modifications:
sudo service isc-dhcp-server restart
Further it makes sense to copy your ssh keys through the whole cluster using
ssh-copy-id pirate@192.168.2.1 # and so on...
It will come in handy later with k3sup and while maintaining the thing.
Intermission (former Conclusion)
We set up a cluster using HypriotOS and configured DHCP and NAT. Further, we have a static topology now with an up-to-date state of everything. In the next update of this blog post we use Alex Ellis’ k3sup to get Rancher’s minimal k3s working, followed by an OpenFaaS setup. Potentially, we also introduce how to administer this cluster using Ansible.
k3sup
The following chapter will be a bit more detailed as this is not standard admin stuff. Even though I know people who claim this is the case, but then there is memenetes. To me it still feels pretty new. 🤷♀️
k3sup makes bootstrapping kubernetes very easy. It is a static Go binary. Hence, installing is basically copying it.
First we install k3sup on our laptop which is connected to the master Pi.
curl -sLS https://get.k3sup.dev | sh
sudo install k3sup /usr/local/bin/
Our master Pi from above will be the Kubernetes master, and the nodes will act as agents in our Kubernetes cluster.
First the master:
k3sup install --ip 192.168.2.1 --user pirate
which does some automagic installation for you. Luckily we get informed about what is going on:
Running: k3sup install
Public IP: 192.168.2.1
ssh -i /home/rawland/.ssh/id_rsa -p 22 pirate@192.168.2.1
ssh: curl -sLS https://get.k3s.io | INSTALL_K3S_EXEC='server  --tls-san 192.168.2.1 ' INSTALL_K3S_VERSION='v1.0.1' sh -

[INFO]  Using v1.0.1 as release
[INFO]  Downloading hash https://github.com/rancher/k3s/releases/download/v1.0.1/sha256sum-arm.txt
[INFO]  Downloading binary https://github.com/rancher/k3s/releases/download/v1.0.1/k3s-armhf
[INFO]  Verifying binary download
[INFO]  Installing k3s to /usr/local/bin/k3s
[INFO]  Creating /usr/local/bin/kubectl symlink to k3s
[INFO]  Skipping /usr/local/bin/crictl symlink to k3s, command exists in PATH at /usr/bin/crictl
[INFO]  Creating /usr/local/bin/ctr symlink to k3s
[INFO]  Creating killall script /usr/local/bin/k3s-killall.sh
[INFO]  Creating uninstall script /usr/local/bin/k3s-uninstall.sh
[INFO]  env: Creating environment file /etc/systemd/system/k3s.service.env
[INFO]  systemd: Creating service file /etc/systemd/system/k3s.service
[INFO]  systemd: Enabling k3s unit
Created symlink /etc/systemd/system/multi-user.target.wants/k3s.service → /etc/systemd/system/k3s.service.
[INFO]  systemd: Starting k3s
Result: [INFO]  Using v1.0.1 as release
[INFO]  Downloading hash https://github.com/rancher/k3s/releases/download/v1.0.1/sha256sum-arm.txt
[INFO]  Downloading binary https://github.com/rancher/k3s/releases/download/v1.0.1/k3s-armhf
[INFO]  Verifying binary download
[INFO]  Installing k3s to /usr/local/bin/k3s
[INFO]  Creating /usr/local/bin/kubectl symlink to k3s
[INFO]  Skipping /usr/local/bin/crictl symlink to k3s, command exists in PATH at /usr/bin/crictl
[INFO]  Creating /usr/local/bin/ctr symlink to k3s
[INFO]  Creating killall script /usr/local/bin/k3s-killall.sh
[INFO]  Creating uninstall script /usr/local/bin/k3s-uninstall.sh
[INFO]  env: Creating environment file /etc/systemd/system/k3s.service.env
[INFO]  systemd: Creating service file /etc/systemd/system/k3s.service
[INFO]  systemd: Enabling k3s unit
[INFO]  systemd: Starting k3s
 Created symlink /etc/systemd/system/multi-user.target.wants/k3s.service → /etc/systemd/system/k3s.service.

ssh: sudo cat /etc/rancher/k3s/k3s.yaml
[...]
In the end the cat prints out how k3s is configured on the master Pi. We can also have a look at it by logging into the master Pi and
sudo kubectl get node -o wide
or executing it locally on our laptop, if we have kubectl installed. Sans sudo in the latter case.
This should show us some Docker-ish summary of k8s. To summarize what just happened: k3sup installed Rancher’s k3s + a bunch of scripts on the master Pi. If you mess things up, going back to normal is basically sudo k3-uninstall.sh. As we witnessed, k3sup somehow determined what variant of k3s had to be installed with the given hardware (armhf), which is a nice thing. Further we received a kubeconfig which was also stored locally. I trimmed this away above. The kubeconfig also sits in /etc/rancher/k3s/k3s.yaml on the master Pi.
Now, back on our laptop, we join the other agents/nodes to our cluster:
k3sup join --ip 192.168.2.101 --server-ip 192.168.2.1 --user pirate
and this for every node. Which is 192.168.2.101-103 for me. If you want to automate this, you can also create a simple BASH script. It can happen that the latter command finishes with the following error:
Error: unable to connect to 192.168.2.101:22 over ssh: ssh: handshake failed: ssh: unable to authenticate, attempted methods [none publickey], no supported methods remain
which means that we didn’t copy our ssh key over with ssh-copy-id (see above). If everything went fine we see four entries in the return from sudo kubectl get node -o wide.
At this point we can deploy stuff on Kubernetes if we want to. 😊
Kubernetes Dashboard
To get an overview of the state of our Kubernetes cluster, we install the dashboard.
For this we need kubectl on our laptop. To install it, when you are on something Debian-ish:
sudo apt-get update && sudo apt-get install -y apt-transport-https
curl -s https://packages.cloud.google.com/apt/doc/apt-key.gpg | sudo apt-key add -
echo "deb https://apt.kubernetes.io/ kubernetes-xenial main" | sudo tee -a /etc/apt/sources.list.d/kubernetes.list
sudo apt-get update
sudo apt-get install -y kubectl
Then let’s see if we can do it in one go.
k3sup app install kubernetes-dashboard
which results in
0> k3sup app install kubernetes-dashboard
Using kubeconfig: /home/rawland/kubeconfig
armNode architecture: "arm"
namespace/kubernetes-dashboard unchanged
serviceaccount/kubernetes-dashboard unchanged
service/kubernetes-dashboard unchanged
secret/kubernetes-dashboard-certs unchanged
secret/kubernetes-dashboard-csrf configured
Warning: kubectl apply should be used on resource created by either kubectl create --save-config or kubectl apply
secret/kubernetes-dashboard-key-holder configured
configmap/kubernetes-dashboard-settings unchanged
role.rbac.authorization.k8s.io/kubernetes-dashboard unchanged
clusterrole.rbac.authorization.k8s.io/kubernetes-dashboard unchanged
rolebinding.rbac.authorization.k8s.io/kubernetes-dashboard unchanged
clusterrolebinding.rbac.authorization.k8s.io/kubernetes-dashboard unchanged
deployment.apps/kubernetes-dashboard unchanged
service/dashboard-metrics-scraper unchanged
deployment.apps/dashboard-metrics-scraper unchanged
error: must specify one of -f and -k
error: must specify one of -f and -k
=======================================================================
= Kubernetes Dashboard has been installed. =
=======================================================================
#To forward the dashboard to your local machine
kubectl proxy
#To get your Token for logging in
kubectl -n kubernetes-dashboard describe secret $(kubectl -n kubernetes-dashboard get secret | grep default-token | awk '{print $1}')
# Once Proxying you can navigate to the below
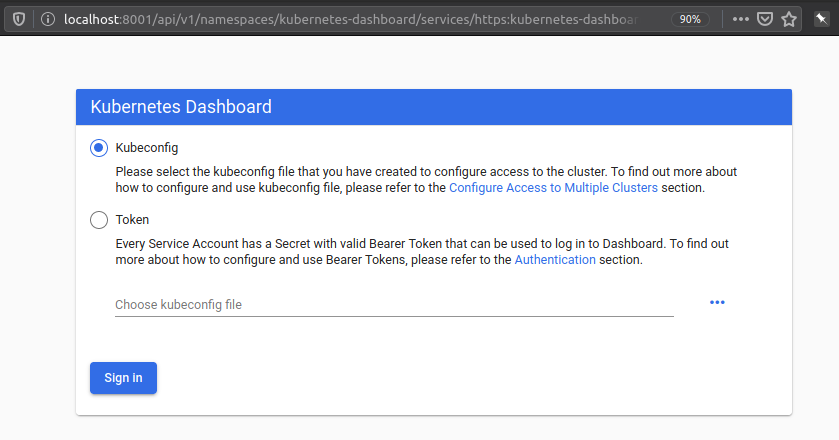
http://localhost:8001/api/v1/namespaces/kubernetes-dashboard/services/https:kubernetes-dashboard:/proxy/#/login
Thanks for using k3sup!
for me.
At this point it looks like something is broken here. As there are two lines containing: error: must specify one of -f and -k, which means: Have a look at the code, what the heck is going on here. For now I simply ignore it and note down to maybe help out at the repo (TODO).
Trying the recommendations to kubectl proxy the dashboard to our localhost (laptop), however, results in a seemingly functioning Kubernetes Dashboard:
To get the token we can:
sudo kubectl -n kubernetes-dashboard describe secret $(sudo kubectl -n kubernetes-dashboard get secret | grep default-token | awk '{print $1}')
on the master Pi, as the defaults following the manual on the laptop fail with:
0> kubectl -n kubernetes-dashboard describe secret $(kubectl -n kubernetes-dashboard get secret | grep default-token | awk '{print $1}')
The connection to the server localhost:8080 was refused - did you specify the right host or port?
The connection to the server localhost:8080 was refused - did you specify the right host or port?
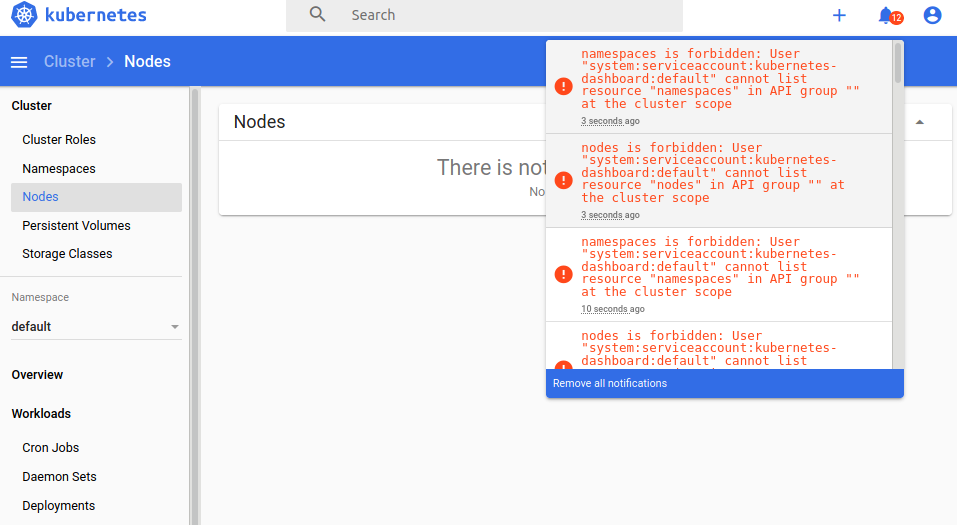
At this point it is pretty likely that k3sup is clashing with HypriotOS considering the kubernetes-dashboard installation.
Cleaning up
At this point in time, it’s time to see if we can clean up. (TODO: Diff the whole image maybe?)
On the master Pi we proceed by:
k3s-killall.sh && k3s-uninstall.sh
And the agents/nodes:
k3s-killall.sh && k3s-agent-uninstall.sh
which looks rather robust.
Intermission (former Conclusion)
We used k3sup to set up a Kubernetes cluster which worked out nicely. Unfortunately we failed to install the kubernetes-dashboard using k3sup and have to debug what is going on there. Most likely a simple authorization problem. Further, it has to be mentioned that k3sup is a one-way route, as there is no direct way to uninstall things using k3sup as far as I see. However, as things are really lightweight it seems to be OK enough to use the uninstall scripts.
OpenFaaS
After setting up k3sup again, which is rather easy as described above or with a shell script, we attempt to install OpenFaaS now and deploy a figlet. If you are wondering what a figlet is, I do, too. This probably has a few hints..
Nevertheless, we have k3s everywhere and kubectl get nodes shows a reasonable cluster again.
We start with
k3sup app install openfaas
And party on! 😊 Everything works out of the box:
Using kubeconfig: /home/rawland/kubeconfig
armNode architecture: "arm"
x86_64
Linux
Client: "x86_64", "Linux"
2020/01/21 18:22:32 User dir established as: /home/rawland/.k3sup/
"openfaas" has been added to your repositories
Hang tight while we grab the latest from your chart repositories...
...Skip local chart repository
...Successfully got an update from the "openfaas" chart repository
...Successfully got an update from the "stable" chart repository
Update Complete.
namespace/openfaas created
namespace/openfaas-fn created
secret/basic-auth created
wrote /tmp/charts/openfaas/rendered/openfaas/templates/alertmanager-cfg.yaml
wrote /tmp/charts/openfaas/rendered/openfaas/templates/prometheus-cfg.yaml
wrote /tmp/charts/openfaas/rendered/openfaas/templates/controller-rbac.yaml
wrote /tmp/charts/openfaas/rendered/openfaas/templates/prometheus-rbac.yaml
wrote /tmp/charts/openfaas/rendered/openfaas/templates/alertmanager-svc.yaml
wrote /tmp/charts/openfaas/rendered/openfaas/templates/basic-auth-plugin-svc.yaml
wrote /tmp/charts/openfaas/rendered/openfaas/templates/gateway-external-svc.yaml
wrote /tmp/charts/openfaas/rendered/openfaas/templates/gateway-svc.yaml
wrote /tmp/charts/openfaas/rendered/openfaas/templates/nats-svc.yaml
wrote /tmp/charts/openfaas/rendered/openfaas/templates/prometheus-svc.yaml
wrote /tmp/charts/openfaas/rendered/openfaas/templates/alertmanager-dep.yaml
wrote /tmp/charts/openfaas/rendered/openfaas/templates/basic-auth-plugin-dep.yaml
wrote /tmp/charts/openfaas/rendered/openfaas/templates/faas-idler-dep.yaml
wrote /tmp/charts/openfaas/rendered/openfaas/templates/gateway-dep.yaml
wrote /tmp/charts/openfaas/rendered/openfaas/templates/nats-dep.yaml
wrote /tmp/charts/openfaas/rendered/openfaas/templates/prometheus-dep.yaml
wrote /tmp/charts/openfaas/rendered/openfaas/templates/queueworker-dep.yaml
configmap/alertmanager-config created
deployment.apps/alertmanager created
service/alertmanager created
deployment.apps/basic-auth-plugin created
service/basic-auth-plugin created
serviceaccount/openfaas-controller created
role.rbac.authorization.k8s.io/openfaas-controller created
rolebinding.rbac.authorization.k8s.io/openfaas-controller created
deployment.apps/faas-idler created
deployment.apps/gateway created
service/gateway-external created
service/gateway created
deployment.apps/nats created
service/nats created
configmap/prometheus-config created
deployment.apps/prometheus created
serviceaccount/openfaas-prometheus created
role.rbac.authorization.k8s.io/openfaas-prometheus created
rolebinding.rbac.authorization.k8s.io/openfaas-prometheus created
service/prometheus created
deployment.apps/queue-worker created
=======================================================================
= OpenFaaS has been installed.                                        =
=======================================================================

# Get the faas-cli
curl -SLsf https://cli.openfaas.com | sudo sh

# Forward the gateway to your machine
kubectl rollout status -n openfaas deploy/gateway
kubectl port-forward -n openfaas svc/gateway 8080:8080 &

# If basic auth is enabled, you can now log into your gateway:
PASSWORD=$(kubectl get secret -n openfaas basic-auth -o jsonpath="{.data.basic-auth-password}" | base64 --decode; echo)
echo -n $PASSWORD | faas-cli login --username admin --password-stdin

faas-cli store deploy figlet
faas-cli list

# For Raspberry Pi
faas-cli store list \
 --platform armhf

faas-cli store deploy figlet \
 --platform armhf

# Find out more at:
# https://github.com/openfaas/faas

Thanks for using k3sup!
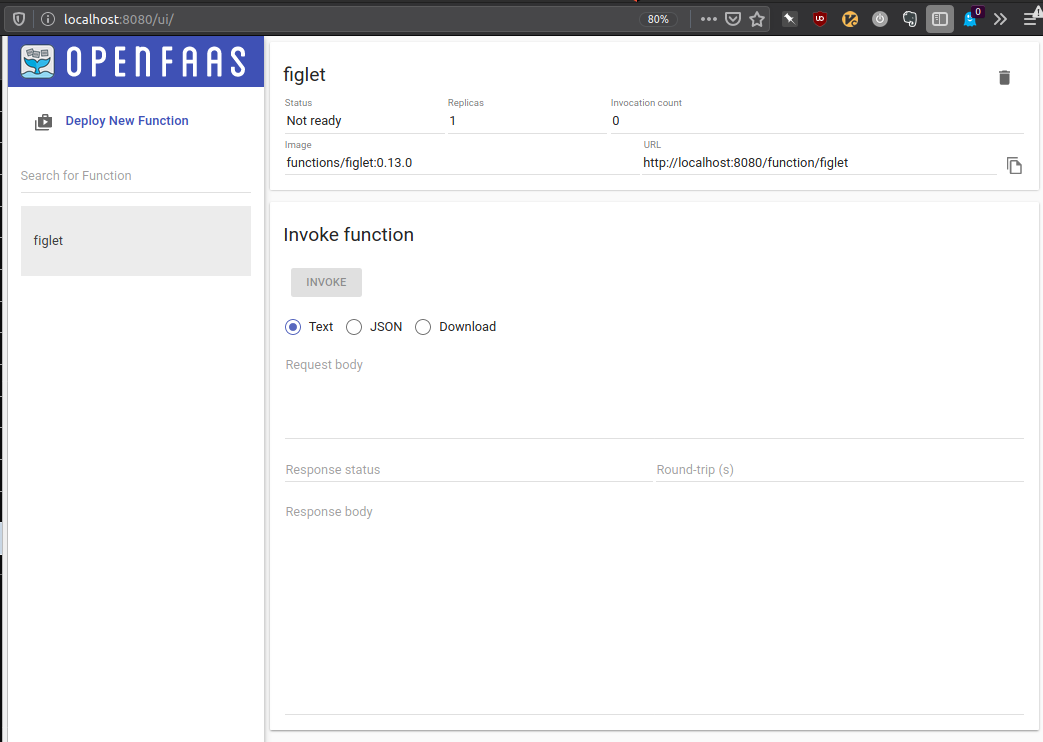
Also giving us some hints for the next steps. Using Alex’ manual: Will it cluster? and the console output as rough guidance we move on. We install faas-cli as described above. Following that, we forward the gateway to the laptop we’re sitting at. Also we pass on the password to faas-cli using the following two commands and also log in with the admin:$PASSWORD pair into the frontend, which looks like this (after figlet was deployed without taking care of the platform 🤦♀):
Now, let’s look what is in store for the armhf platform:
faas-cli store list --platform armhf
Here we finally find the answer, what a ‘figlet’ is:
FUNCTION                    DESCRIPTION
NodeInfo                    Get info about the machine that you'r...
Figlet                      Generate ASCII logos with the figlet CLI
SSL/TLS cert info           Returns SSL/TLS certificate informati...
YouTube Video Downloader    Download YouTube videos as a function
OpenFaaS Text-to-Speech     Generate an MP3 of text using Google'...
nslookup                    Uses nslookup to return any IP addres...
Docker Image Manifest Query Query an image on the Docker Hub for ...
Left-Pad                    left-pad on OpenFaaS
Identicon Generator         Create an identicon from a provided s...
Let’s deploy it:
1> faas-cli store deploy figlet --platform=armhf
WARNING! Communication is not secure, please consider using HTTPS. Letsencrypt.org offers free SSL/TLS certificates.
Handling connection for 8080
Handling connection for 8080

Deployed. 202 Accepted.
URL: http://127.0.0.1:8080/function/figlet
Note, that we attached a --platform=armhf to the deployment compared to the help after k3sups hints! Now, let’s see if we are there:
1> faas-cli list
Handling connection for 8080
Function                        Invocations     Replicas
figlet                          0               1
Here we are. Let’s test it. We can go two routes now. First we can invoke the function directly:
1> faas invoke figlet
Reading from STDIN - hit (Control + D) to stop.
I love ARM!
Handling connection for 8080
 ___   _                     _    ____  __  __ _
|_ _| | | _____   _____     / \  |  _ \|  \/  | |
 | |  | |/ _ \ \ / / _ \   / _ \ | |_) | |\/| | |
 | |  | | (_) \ V /  __/  / ___ \|  _ <| |  | |_|
|___| |_|\___/ \_/ \___| /_/   \_\_| \_\_|  |_(_)
That looks good. 😊
Or let’s pass input directly:
1> echo -n "I like $(uname -m)" | faas invoke figlet -g localhost:8080/function/figlet                                                                                           ↻  ⎇  ~/src/openfaas@elephantsdream
Handling connection for 8080
 ___   _ _ _               ___   __      __   _  _
|_ _| | (_) | _____  __  _( _ ) / /_    / /_ | || |
 | |  | | | |/ / _ \ \ \/ / _ \| '_ \  | '_ \| || |_
 | |  | | |   <  __/  >  < (_) | (_) | | (_) |__   _|
|___| |_|_|_|\_\___| /_/\_\___/ \___/___\___/   |_|
                                   |_____|
And finally, let’s curl it:
1> echo -n "I'm OK with armv8" | curl --data-binary @- http://localhost:8080/function/figlet
Handling connection for 8080
 ___ _              ___  _  __           _ _   _
|_ _( )_ __ ___    / _ \| |/ / __      _(_) |_| |__
 | ||/| '_ ` _ \  | | | | ' /  \ \ /\ / / | __| '_ \
 | |  | | | | | | | |_| | . \   \ V  V /| | |_| | | |
|___| |_| |_| |_|  \___/|_|\_\   \_/\_/ |_|\__|_| |_|

                           ___
  __ _ _ __ _ __ _____   _( _ )
 / _` | '__| '_ ` _ \ \ / / _ \
| (_| | |  | | | | | \ V / (_) |
 \__,_|_|  |_| |_| |_|\_/ \___/
Great success!
Conclusion
We deployed OpenFaaS and installed the faas-cli CLI program on our laptop. Then we rolled out the gateway and proxied it to our laptop such that we could access it locally.
Armed with this we deployed one function from the store and tested it by various means. Finally for the next time, let’s see if we can expand our setup and diagnose the system in depth.